How to import and view custom CDR files
This topic describes how to import and view custom CDR files. Custom CDR files are landline and wireless files which contain no location data. Although these files have no location data they provide you with information on the date/time that people were in contact.
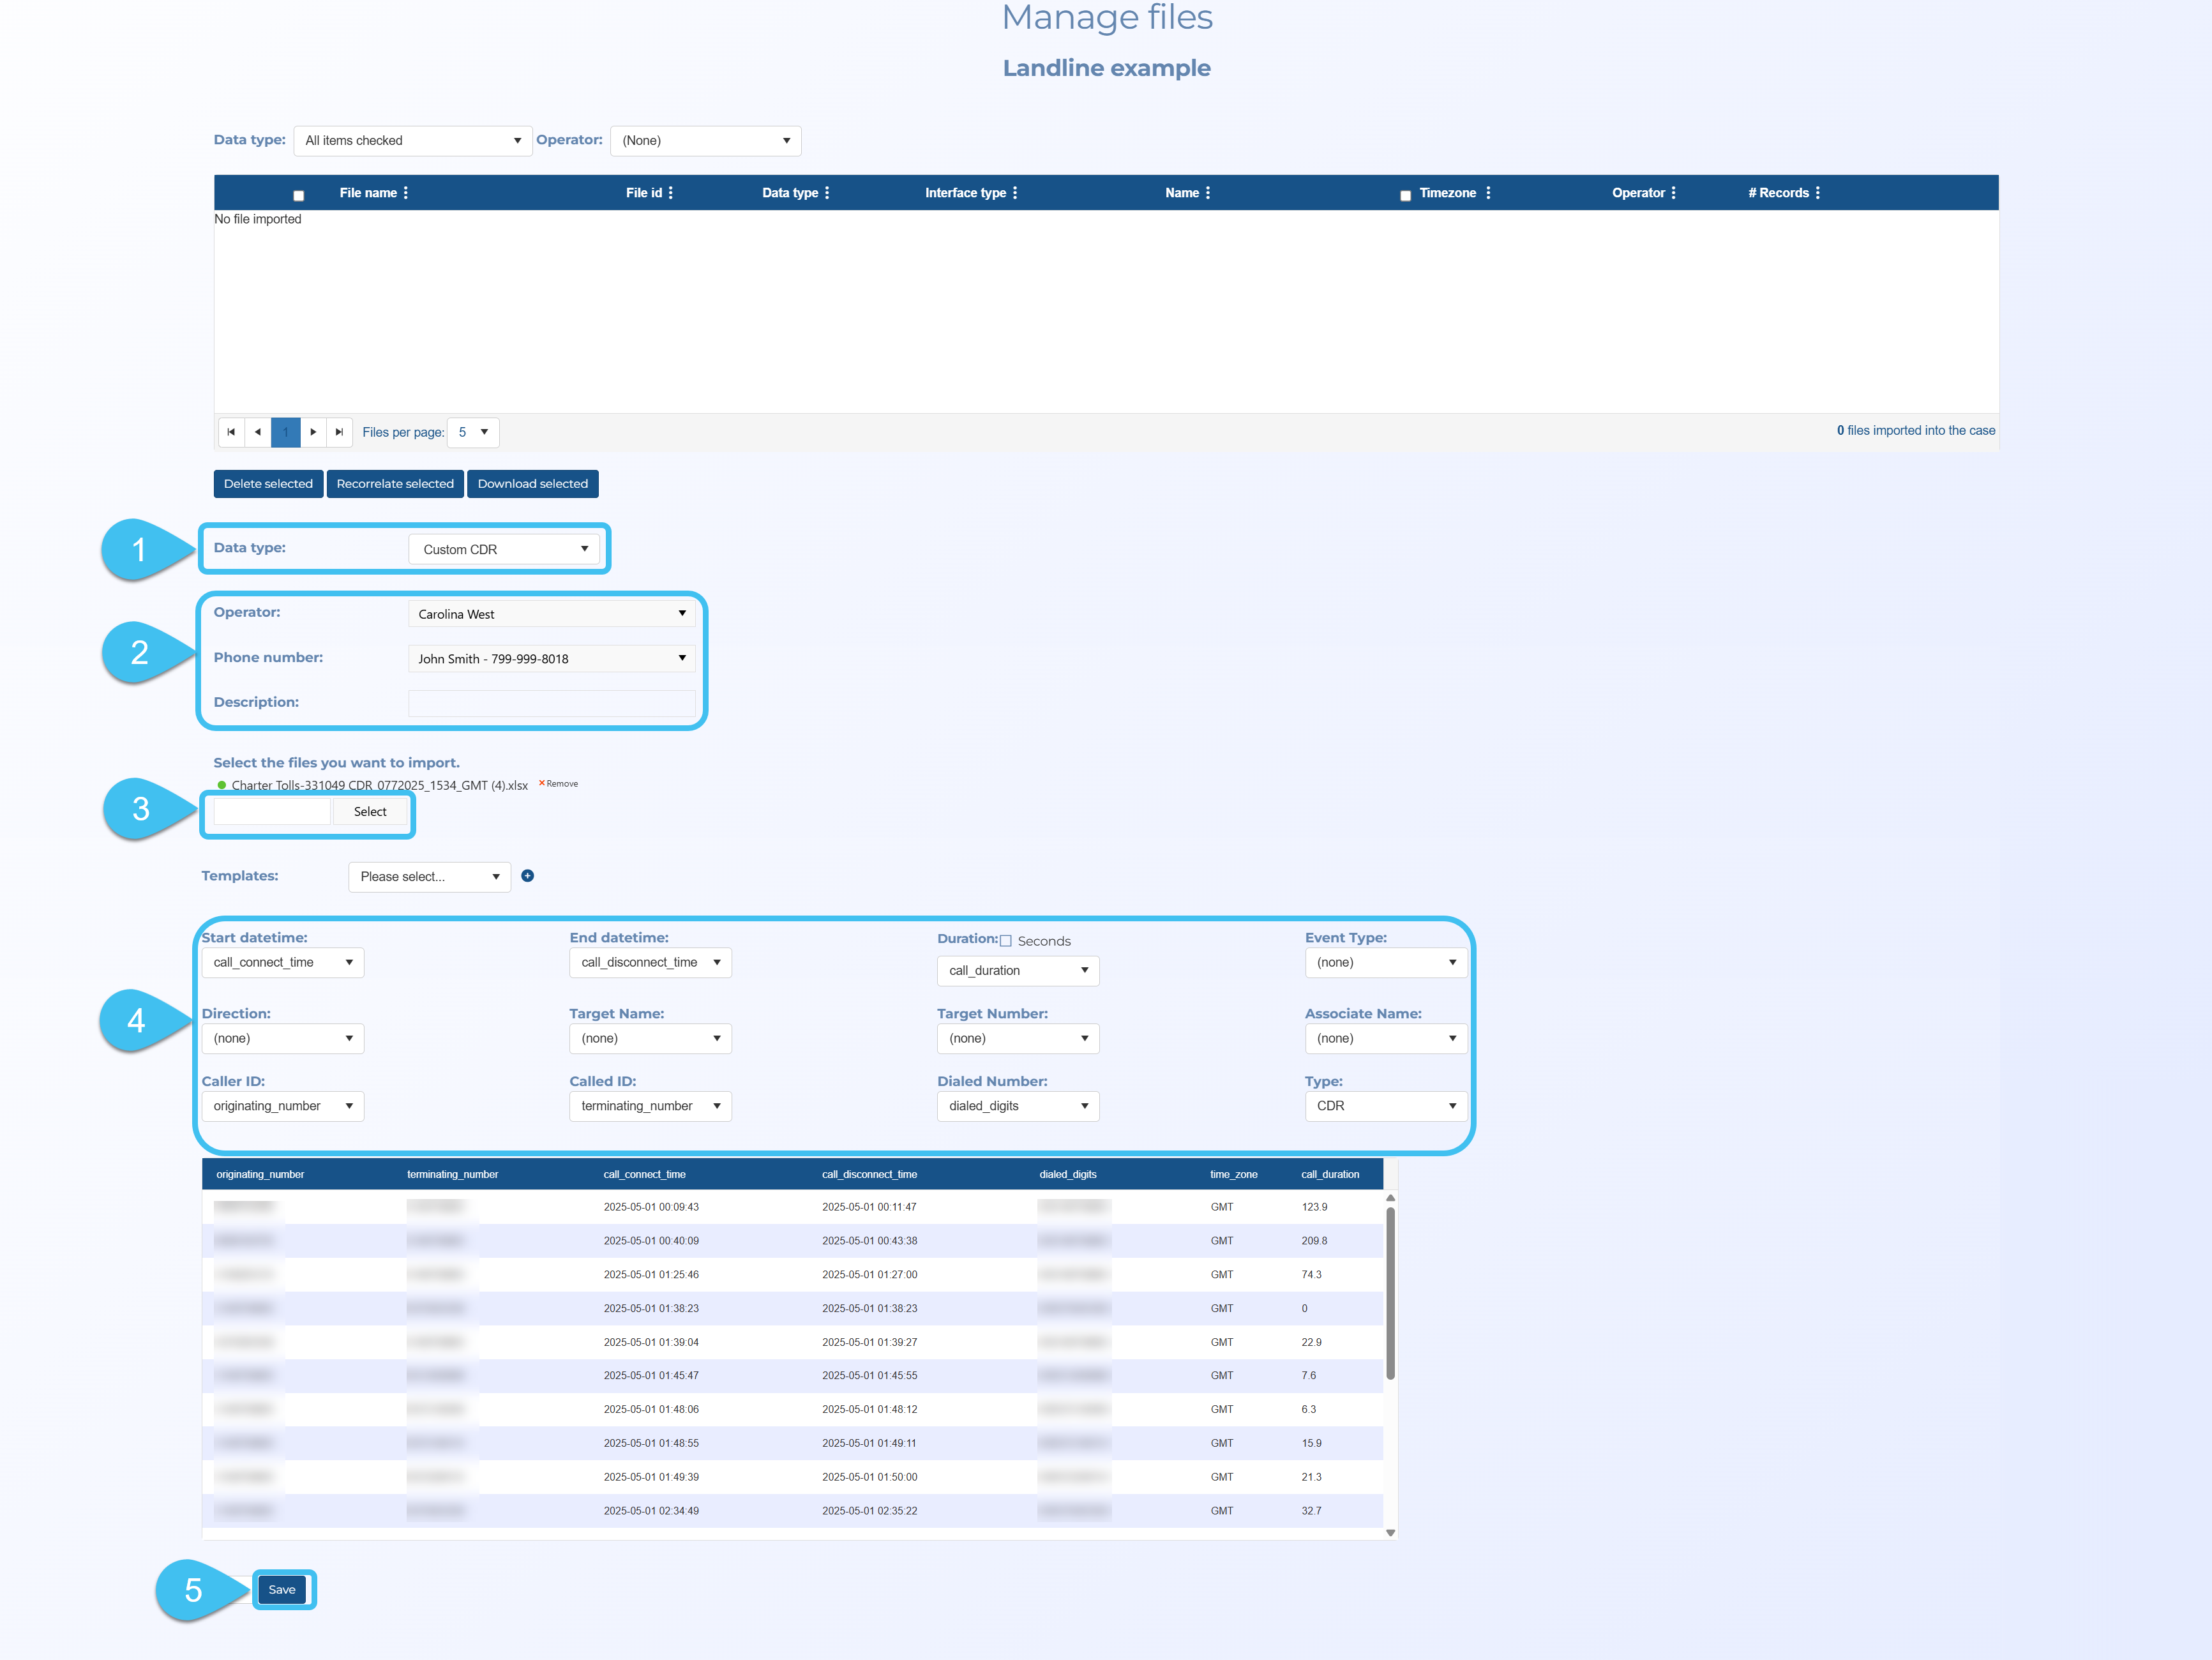
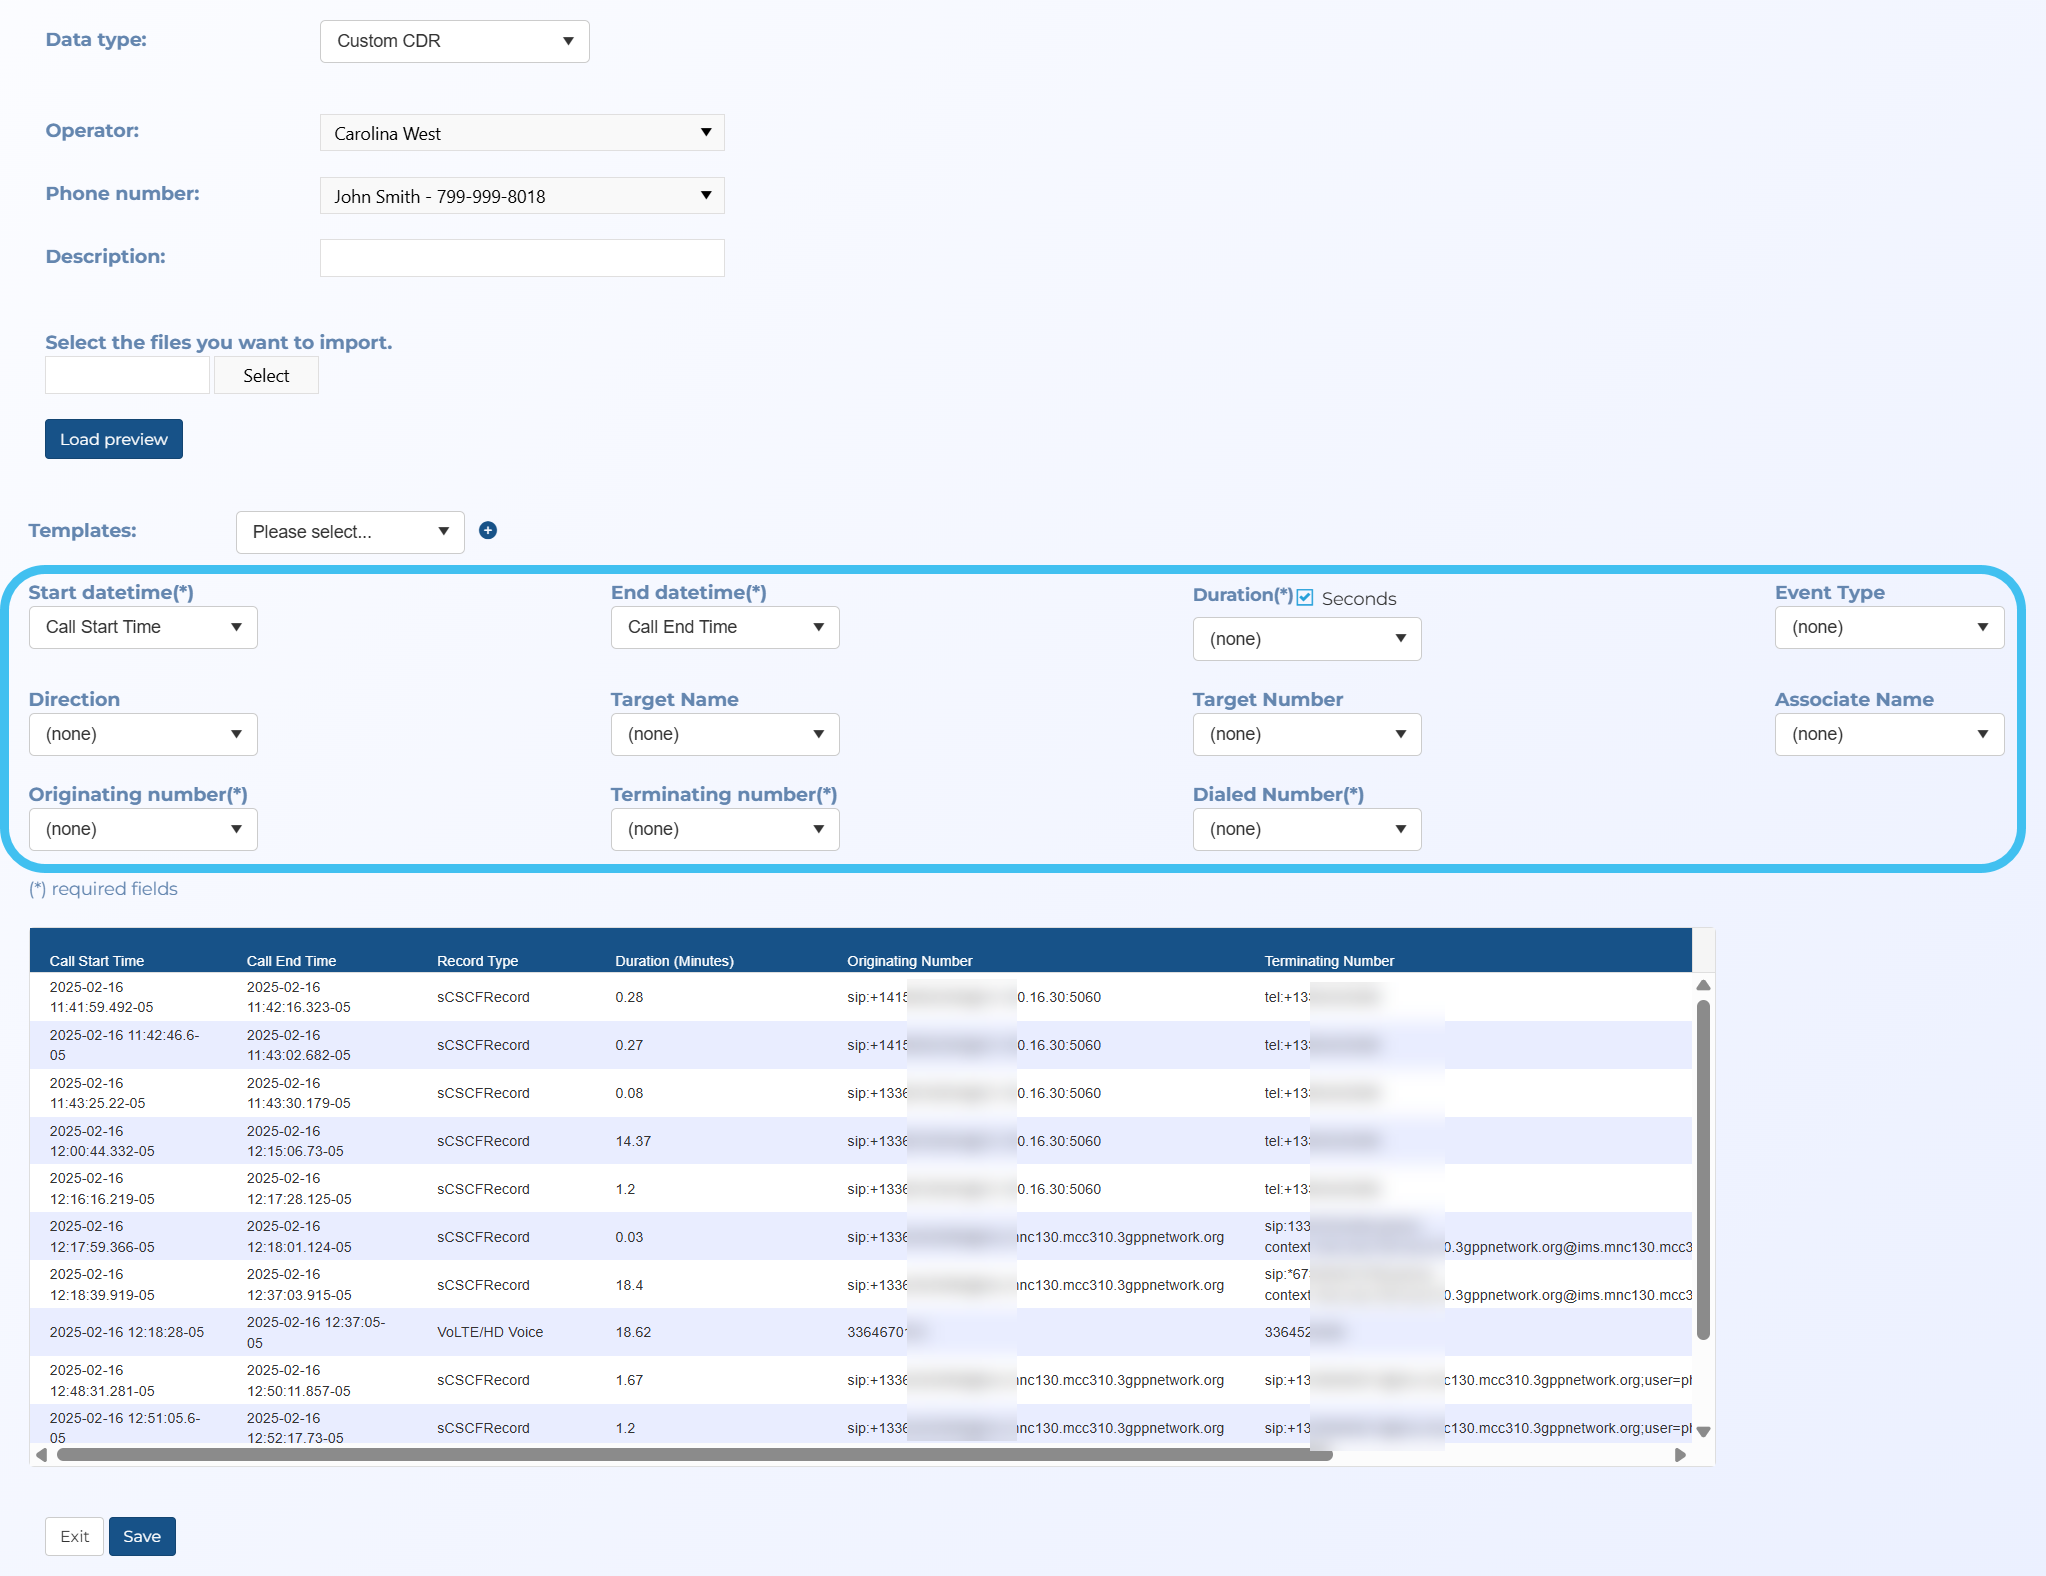
First you must create a person with their phone number, then you can import the file on the Manage files screen when Data type is set to Custom CDR. Once the file is uploaded, ensure Start datetime, End datetime, Duration, Originating number, Terminating number and Dialed number are all mapped to a column in the uploaded file as these columns are mandatory. After importing, you can then view the data on the ESPA analysis center's CDR data tab.
Use the following graphic for a quick reference or refer to the steps below for additional details.

Click here for a short video on how to import custom CDR data.
-
For the case you want to upload a custom toll file to, open the Manage case screen.
 Need help finding your case?
On the main menu click View cases. The screen that opens depends on your setting of View cases. If it is set to:
- Advanced view, then the Advanced view cases screen opens.
- If your case is listed on the Favorite & recent cases tab, click the case name to open the Manage case screen.
- If it is not listed on the Favorite & recent cases tab, then click the Cases tab. Use the search filters to help locate your case. You can also click
 to open the FILTERS group which allows you to set your own default filter defining what is displayed on this tab, for example you may wish to set it to cases that you created which are currently open.
For further information refer to Searching for a case.
- Grid view, then the View cases screen opens.
- If your case is listed under My recent cases click it to open the Manage case screen.
- If it is not listed under My recent cases then select your case from the table, using the search filters to help locate it if required. Note, by default the search is set to only display cases that you created; if you are not the original creator but an assignee then ensure you set Case filter to Assigned cases before clicking Search.
- Tree view, then the View i-cases screen opens.
- Click
 at the top-right of the screen to open either the View Cases or Advanced view cases screen and follow the above description.
- Click
- Advanced view, then the Advanced view cases screen opens.
-
On the Manage case screen click New person, then enter the person and phone number.
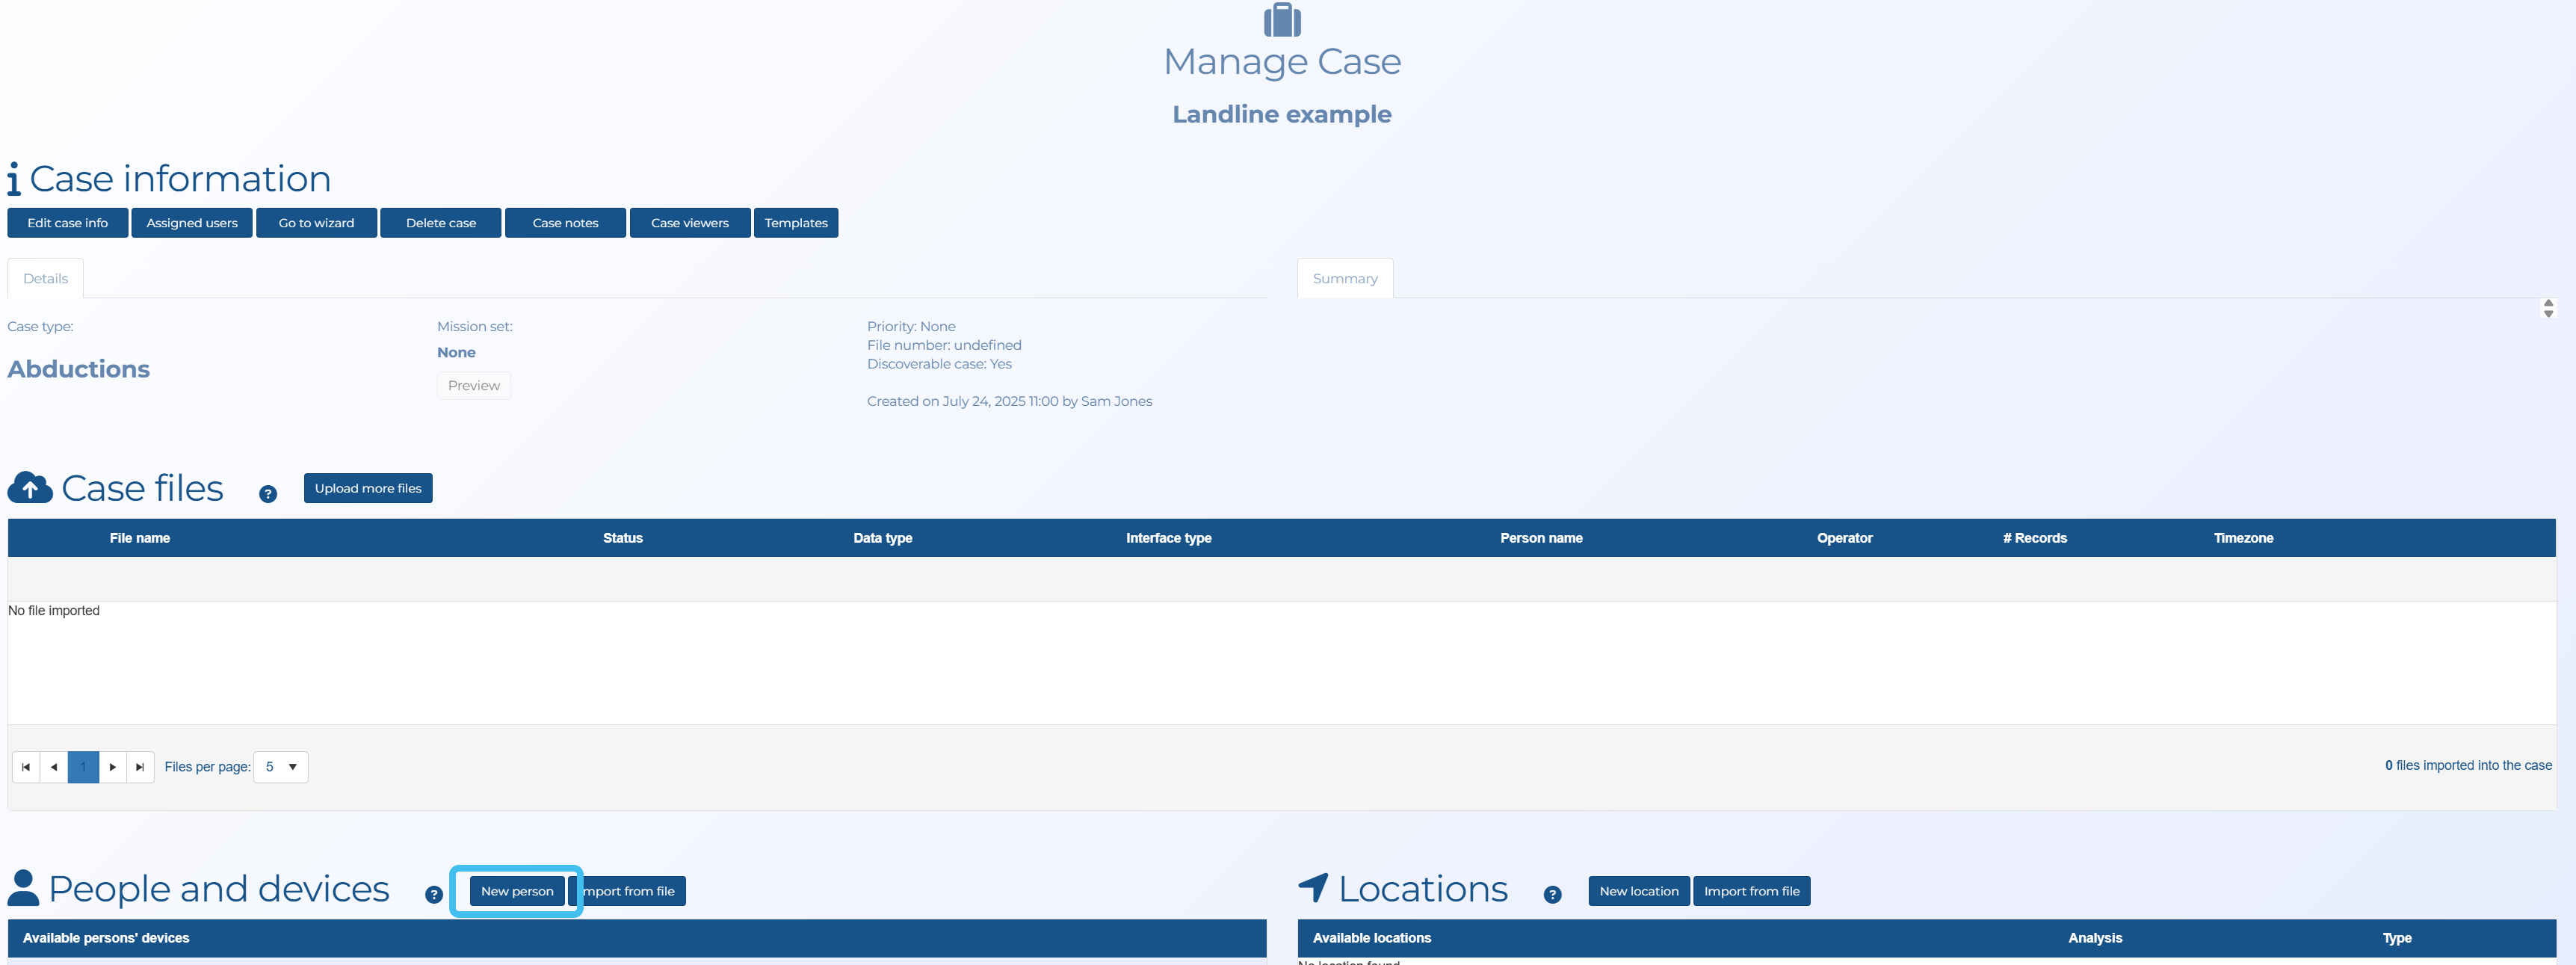
Return to the Manage case screen.
-
On the Manage case screen click Upload more files.
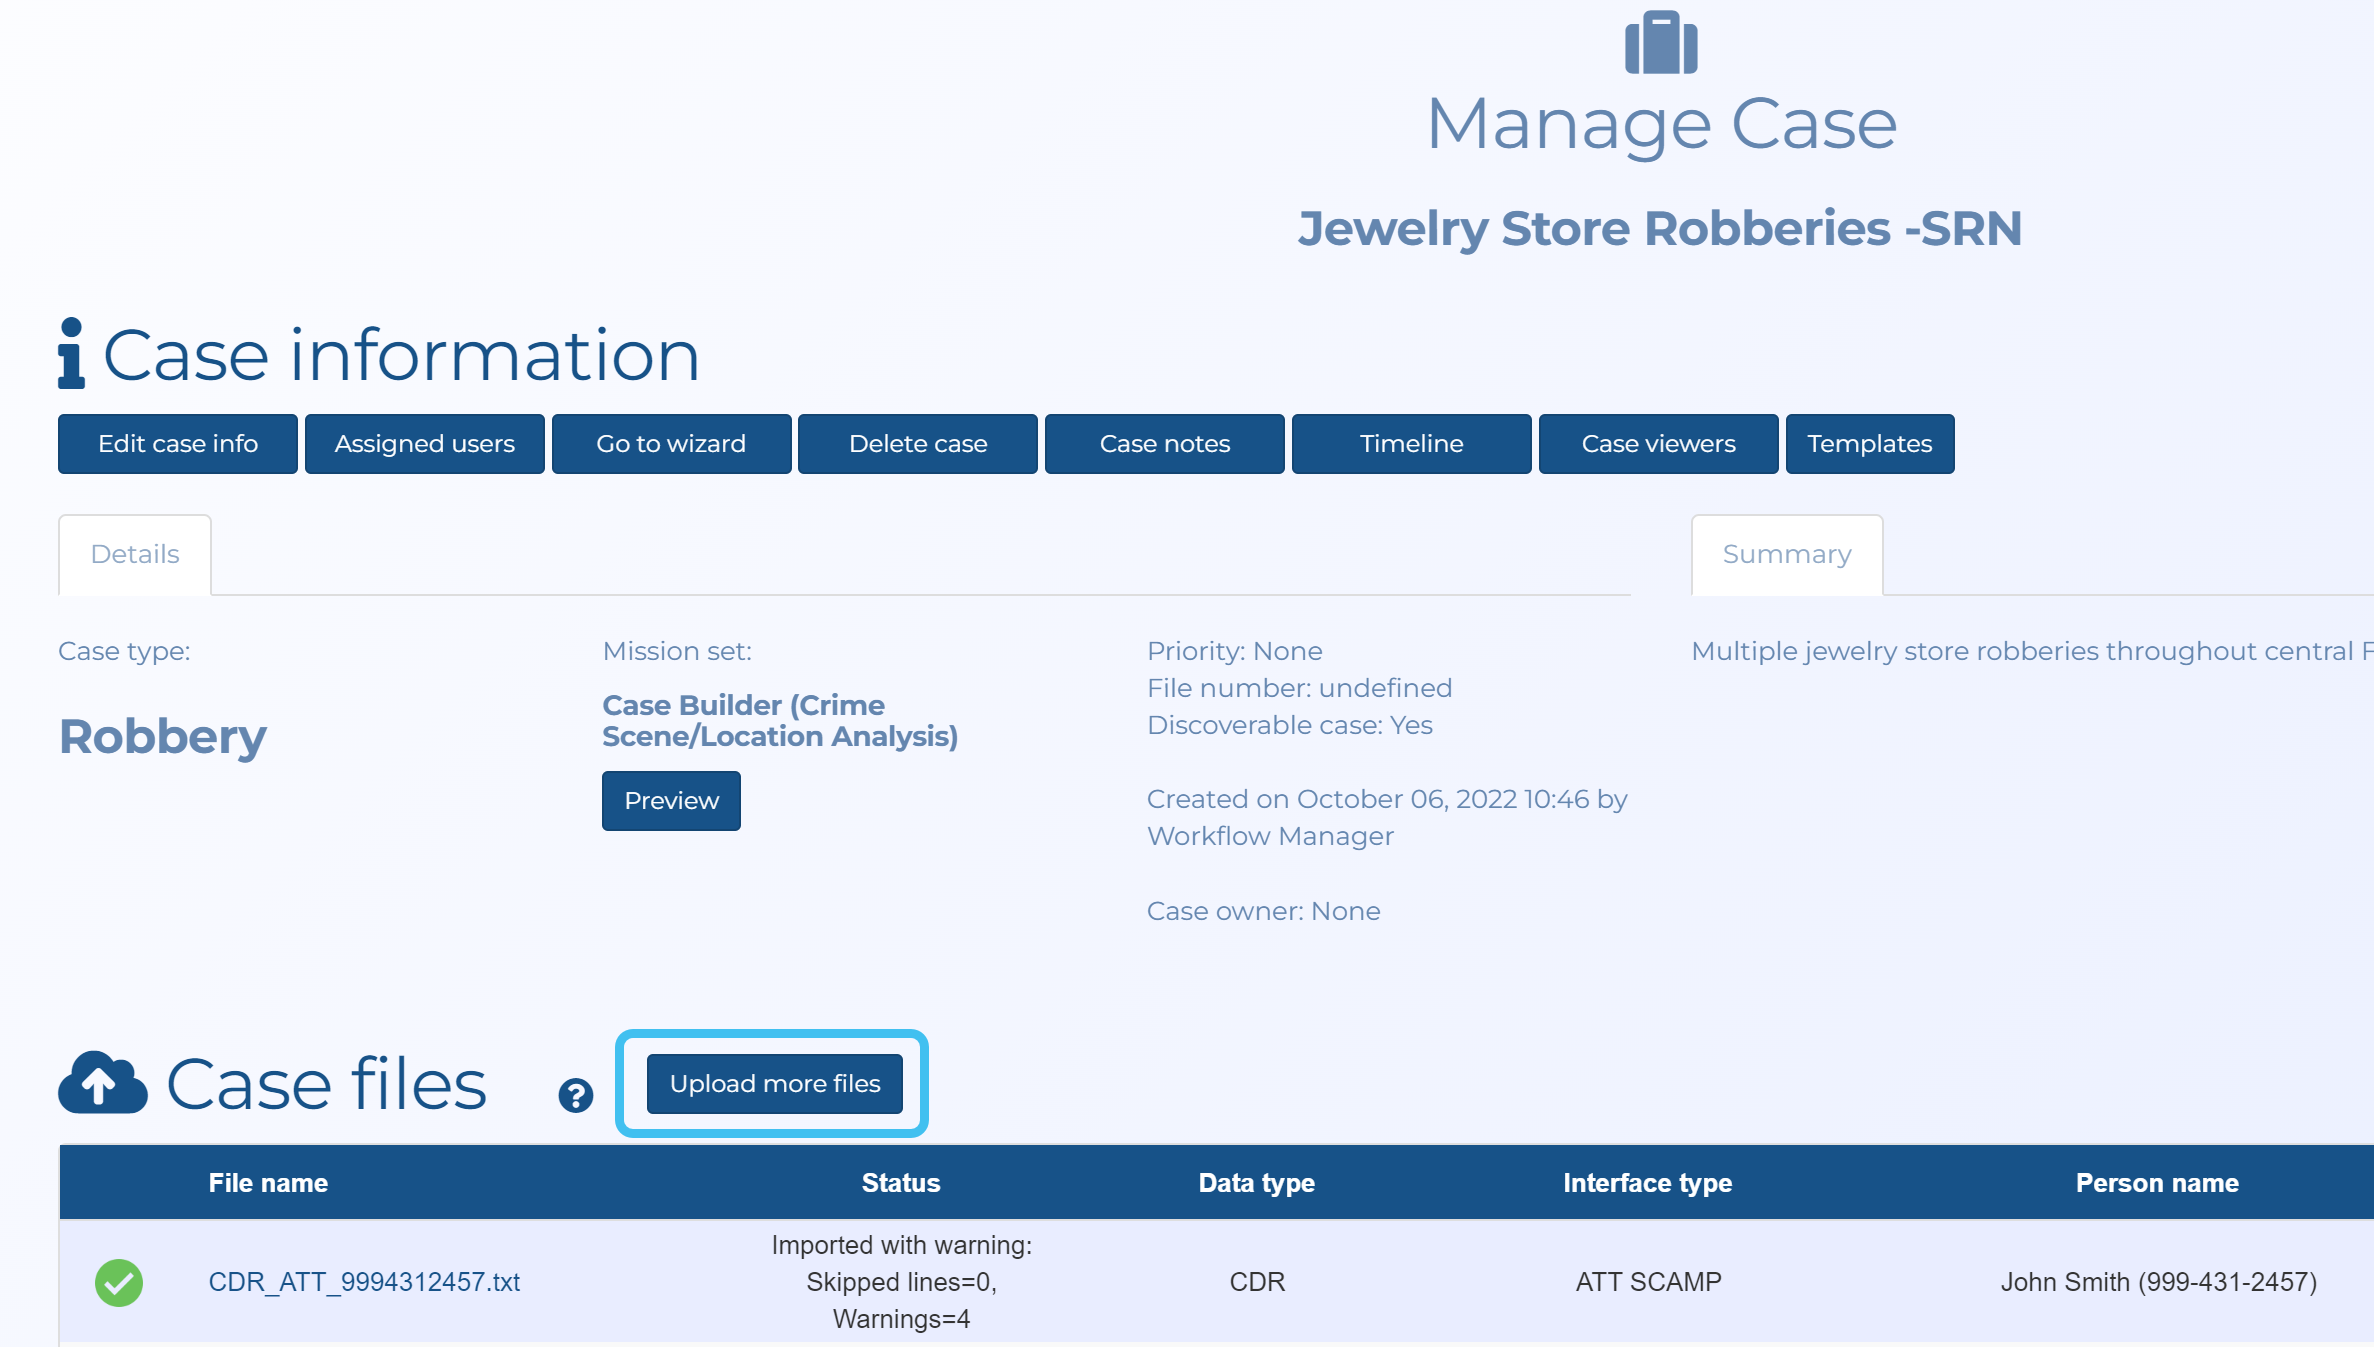
The Manage files screen opens.
-
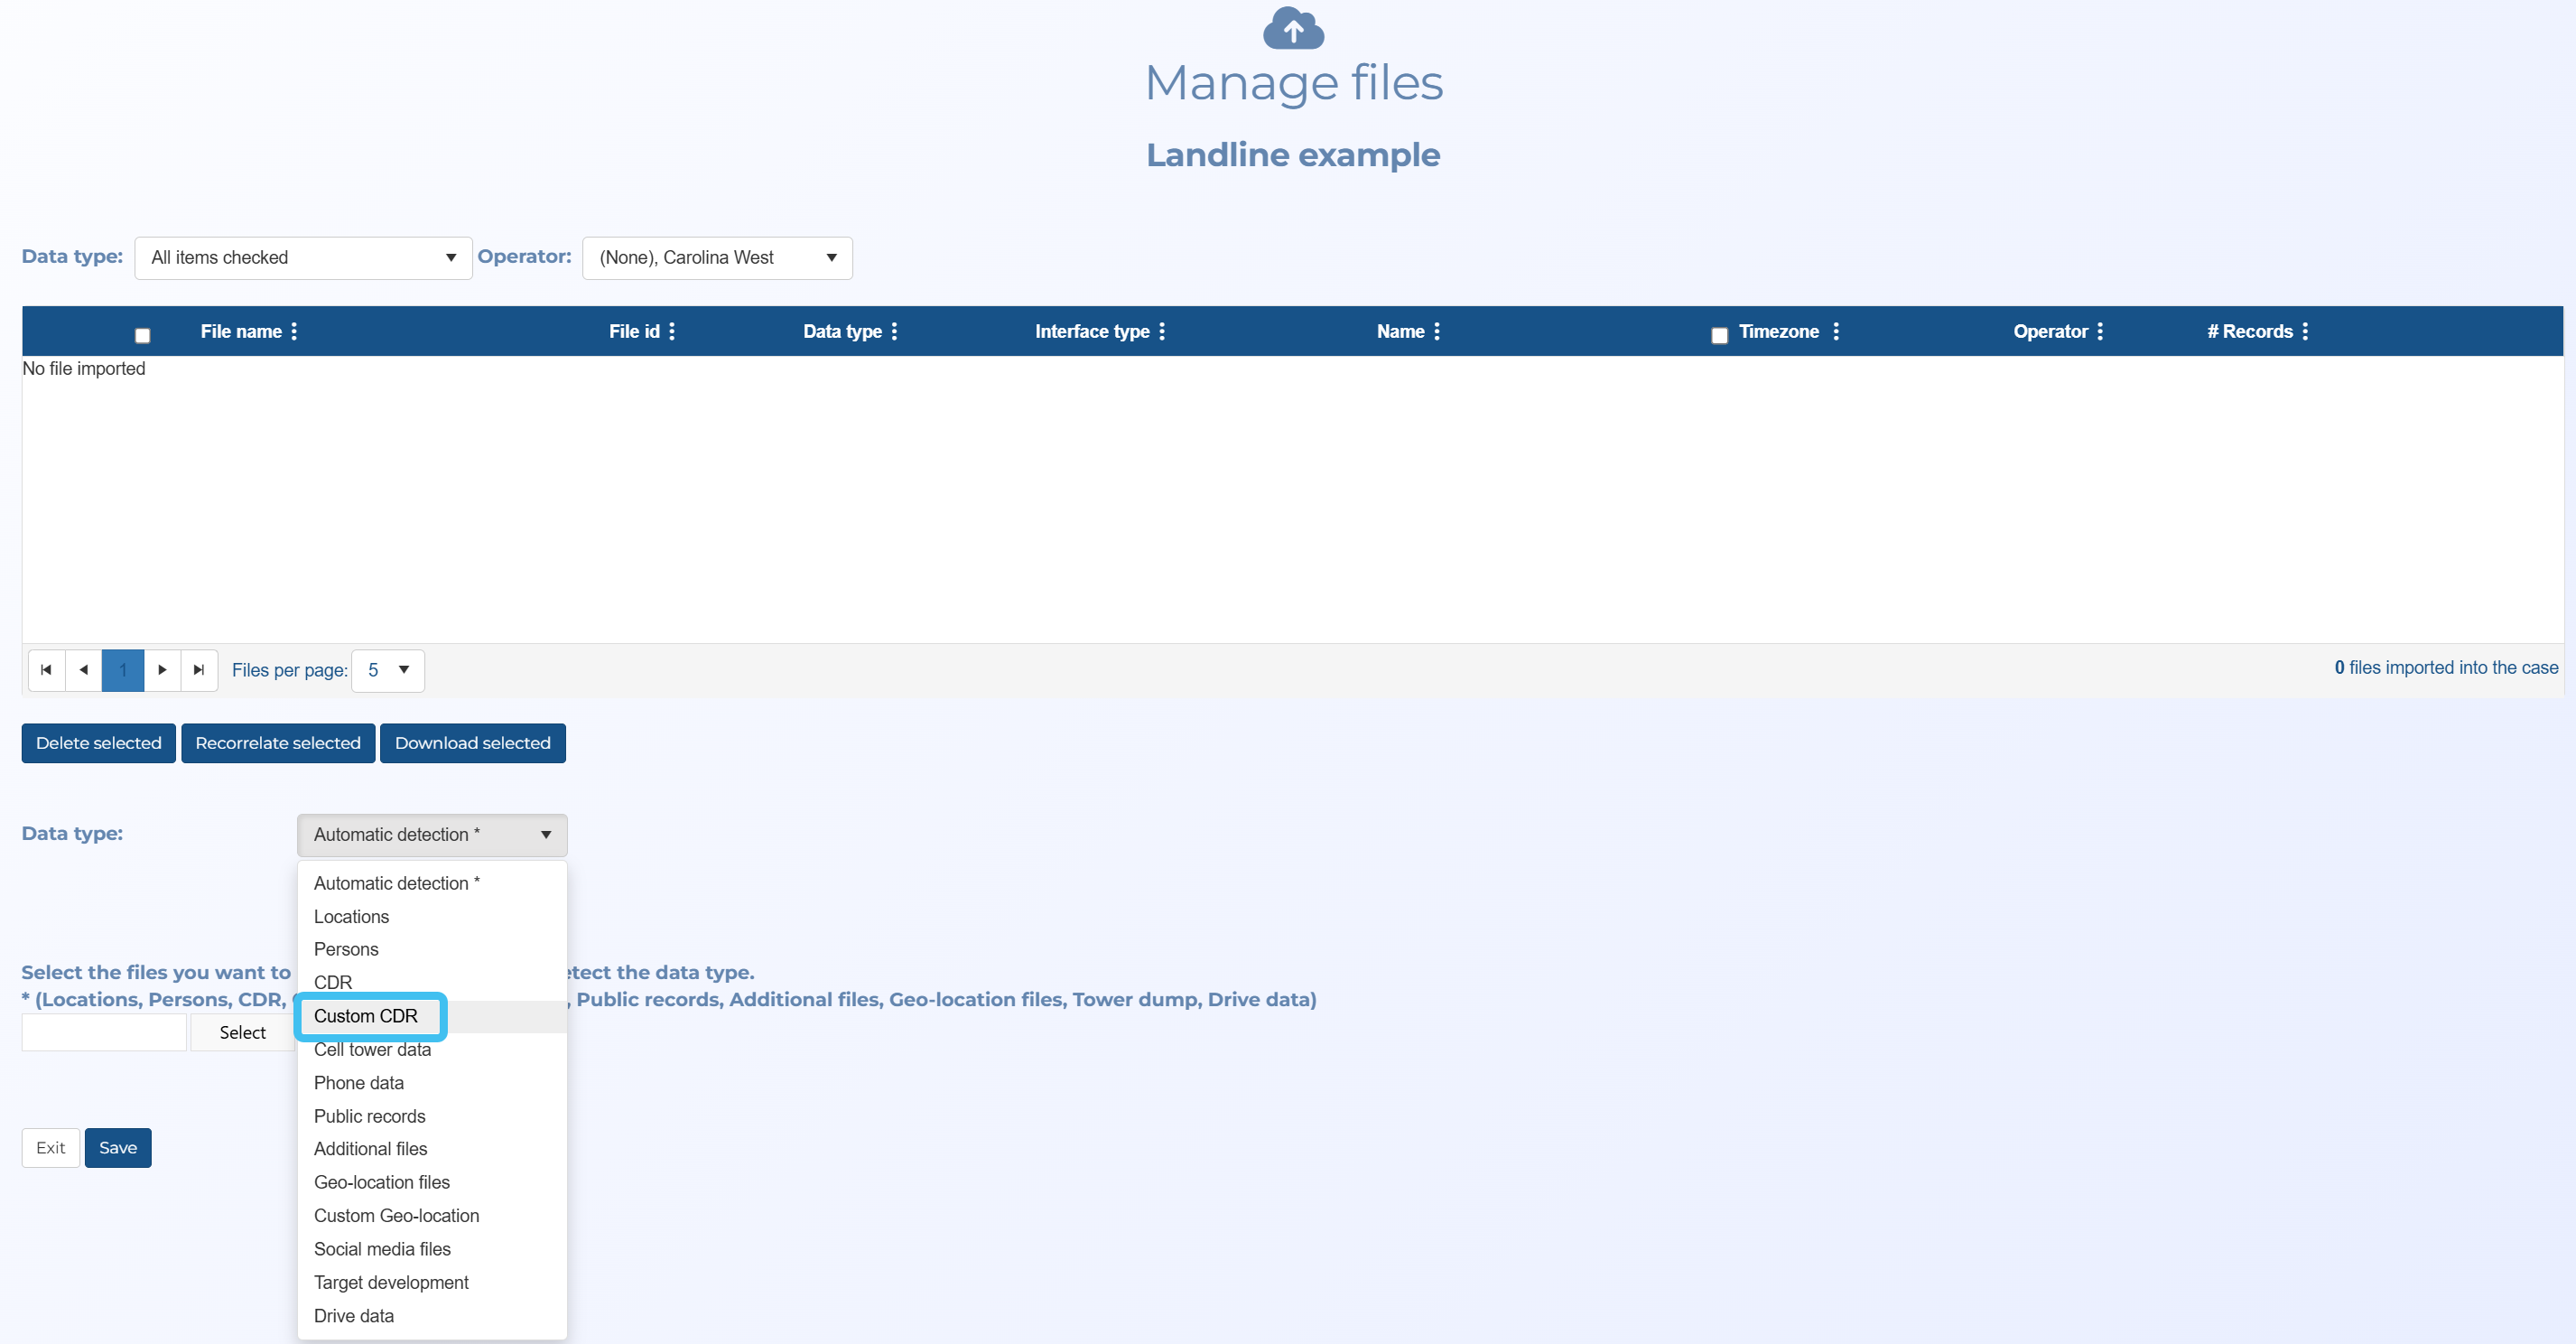
In Data type select Custom CDR.
-
You must select the Operator and the Person.
-
Click Select. Windows Explorer opens. Navigate to the folder and select the required file.
-
Click Load preview.
-
In Distance, select which units are used in the file for distance measurements.
-
The preview table header displays the titles from your file and you must map those to one or more OSS-ESPA fields. Not all columns must be mapped but for the data to be useful it is recommended that you map the Start date, Start time, End date, End time, Duration, Originating number and Destination number.
-
Click Save.
-
Once the file is imported successfully you can then view the data on the ESPA analysis center's CDR data tab.
-
If you regularly import the same format then you may want to create a template so that you do not need to define this mapping each time you import the same file type. To do this, click
 and enter a template name.
If in the future you need to make edits, select the template name and click
 , or if you want to delete it click
  .
.